


NewsInformation Center
Taber Abrasion Tester test operation method
2022/08/22
Share:
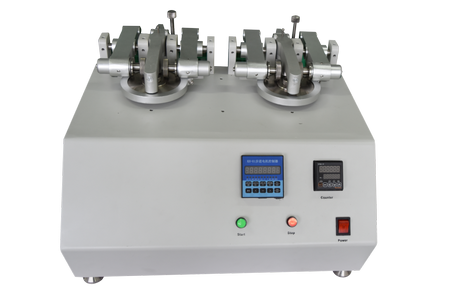
Taber Abrasion Tester is mainly used to test the abrasion resistance of leather and plastic, fabric, floor tiles, plywood, etc. Taber tests involve mounting a flat specimen approximately 100mm square or round to a turntable platform that rotates on a vertical axis at a fixed speed.
How does the Taber type abrasion tester perform the friction test?
From the outside, it is not very obvious, but the equipment is actually used to test the abrasion resistance of leather and plastic, fabric, floor tiles, and plywood by rotating and rubbing different types of friction wheels on the specimen (wheel numbers include H18, H22, CS10, CS17, CS32, CS33).
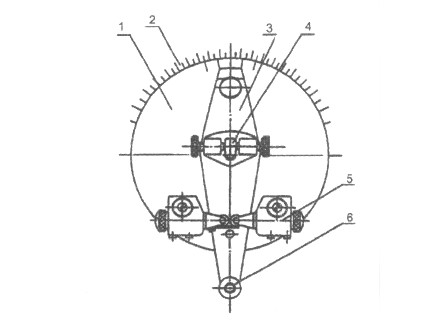
It can be seen that the Taber type abrasion tester relies mainly on rotary grinding, so that it is used to test the abrasion resistance of leather and plastic materials by using different types of friction wheels to rotate on the sample through the test disc. This requires us to choose the set of weights applicable to the standard. The abrasion index has a formula which is: weight of abrasion loss / number of test rotations * 1000
The results of the test are used to identify the properties of the test material and to check the weight loss on the outer surface of the sample, if there is mechanical damage.
The specific operation of the Taber type abrasion tester is as follows 13 points.
1. It is necessary to assemble the grinding wheel (abrasive wheel) required for the sample material before the test according to the relevant test standards for the test material. (Note: the tester will prepare additional fine sandpaper)
2. This step can be cut the standard test piece, and then to be attached to the back of the test piece with double-sided tape (the other side should also be attached to Oh), double-sided tape to remove the paper, weigh the test piece and record the weight, bear paw record to four decimal places.
3. Before opening the test you need to confirm that the power supply voltage is AC220V, frequency of 50HZ.
4. Before the test lift the test arm of the equipment, and then start the power supply to try to run, we can check from here whether the machine is running properly, and then lift the test arm and vacuum arm, remove the test piece fixing nut and spacer (ring), and then use a wrench to loosen the fixing screw of the fixing ring and pick up the fixing ring that is to complete this step.
5. Next step five, Azhong suggests cutting the prepared fine sandpaper into the model of the test piece in advance, then just put the center hole on the screw and then cover the spacer, and then use our nut to fix the fine sandpaper on the disc.
6. After doing the above steps, you need to put on the fixing clip, flatten the sandpaper, and then lock the fixing ring and nut with a wrench.
7. According to the test standard to choose the corresponding grinding wheel and fixed on (test standard according to the actual requirements of the product, can be Baidu corresponding standards), the specific operation is required to loosen and remove the grinding wheel of the fixed nut, and then install the grinding wheel and then tighten and fixed on OK.
8. According to the test standard searched above, the corresponding weight can be placed in the counterweight (for example, the weight of 500 grams). (Equipment weight load has 250G, 500G, 1000G)
9. In the test, we can set the number of test revolutions to 50 (according to different test needs to set their own number of test revolutions, here Azhong just a small example), set down the test arm and vacuum arm, turn on the power and vacuum cleaner, adjust the air volume, while turning on the motor switch to start running.
10. After sandpaper sanding 50 times, turn off the power, remove the sandpaper according to the opposite steps of 4, 5, 6 and 7, and put it on the test according to the steps of 4, 5, 6 and 7.
11. Set the test revolution number to 1000 times, stick the sand layer on the wheel with plastic cloth, and check whether the double-sided adhesive of the test piece is firm. Put the paper sticker on the test disc, then repeat step 10.
12. When the machine reaches the set number of tests then, it will automatically stop working, this does not require additional attention.
13. To this step, the machine has been tested and automatically stopped. After stopping it, the operator can use a small brush to remove the sand layer on the surface of the leather, here you need to pay attention together with the double-sided tape to remove the test piece oh, and then weighing with precision scales, the same is to record, counting to four decimal places, according to the formula to calculate the test value.
Must pay attention to matters: the above operation method can ensure that you in the test process of correct standardized operation, so that the Taber type abrasion tester various functions of effective operation.
Previous: UV Aging Test Chamber common to 3 points of failure cause analysis
N e x t : What should to attention when choosing materials xenon lamp aging test chamber?
